//www.humyo.com/4893137-933213485
Thursday, July 30, 2009
Wednesday, May 27, 2009
Unlock Password Protected PDF & Excel Files Online The Easiest Way For Free
Unlock Password Protected PDF & Excel Files Online The Easiest Way For Free
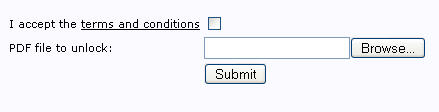
Acrobat Cracks,Adobe Decoder,Adobe PDF,Crack Excel Password,Crack PDF,Decoding PDF,How To Unlock PDF File,PDF Doc,PDF Password Removal,PDF Unlocker,Remove .Xls Password,Remove PDF Password,Remove PDF Restrictions,Unlock Adobe,Unlock Excel Files,Unlocking PDFs PDF authors often restrict their files using PDF security features preventing users from copying, editing or printing the contents, and like every other protection this can also be easily bypassed, there exist several methods to crack or unlock PDF files, but if you are looking for a simple and fast way to just bypass the copying & printing restrictions of the PDF file Ensode online PDF Unlock Utility will be the best option, You just need to upload the file and the unlocked version of the PDF without printing or copying/pasting restrictions will be displayed in a new browser window in your default PDF application, Similarly you can use "Ensode Free Excel Spreadsheet Unlock Online Utility" to unlock Microsoft Excel spreadsheet passwords.
http://www.ensode.net/xls-crack.jsf
http://www.ensode.net/pdf-crack.jsf
Friday, March 27, 2009
How to Install SQL Server 2005
How to Install SQL Server 2005 - A Quick Guide
Purpose: To describe how to perform a basic installation of SQL Server 2005.
Version Information: Although this document addresses SQL Server 2005 Developer Edition, the instructions are very similar or the same for other editions of SQL Server 2005.
Important Notes: Before installing SQL Server 2005, SQL Server 2000 databases should be backed up (if they are required), and the SQL Server 2000 software should be completely un-installed through the Control Panel, UNLESS there is a technical requirement for it to exist on the same machine.
Although SQL Server 2000 and 2005 can exist side by side on the same machine, they have to be installed as separate named instances. This document does not attempt to address the details of SQL Server named instances – if in doubt, consult the DBA for the project for which the installation is being performed.
Should a user require SQL Server 2000 AFTER SQL Server 2005 has been installed, it can be installed as a separate named instance, however a check should be made to ensure that any critical applications that require SQL Server 2000 are capable of supporting named instances – not all are.
1. Insert the DVD into the DVD drive and double-click on the icon:
2. The installation screen should appear:

For most installations, if installing on standard 32 bit Windows XP Professional, click on the x86-based operating systems option.3. Click on Server components, tools, Books online and samples:

4. Read the terms and conditions of the license agreement and click the check box to accept them:
Then click Next.5. The Installing Prerequisites screen appears:
Click on the Install button and wait whilst the system components are configured. This may take 10-20 seconds.6. Once the prerequisites are installed, click on the Next:
7. Wait for a few seconds for the following screen to appear, and then click on Next:
8. The System Configuration Check screen appears:
If the configuration check completes successfully (Success appears in the top panel, all ticks in the Details panel), click on Next.9. Fill in the Registration Information details:

Click on Next.10. Select the components to install:

Note that the components selected in the screen shot above are the most common components that will be needed for most developers and development DBAs. However, if another component such as Analysis Services is needed, it can be added easily afterwards by re-inserting the installation DVD and re-running the setup program.
Click on the Advanced button to open up further options.
11. The advanced Features Selection screen opens:

IMPORTANT NOTE
As a general rule it is not necessary to change the default installation path or the Developer Edition installation, unless your organization has a standard which is different. If in doubt, check an existing PC or server at your site.
Click on Next.
12. Select the Default instance:

IMPORTANT NOTE
If the Default instance radio button is disabled, this probably means that there is another, default instance of SQL Server 2000 or SQL Server 2005 already installed on this machine. In this case, consult the DBA for the project as it may not be necessary or desirable to re-install the database components.
Click on Next.
13. Select the radio button "Use the built-in System account":

The first step will change the Windows account under which the SQL Server service executes to the Local System account. In a production environment or certain development environments, it may be desirable to change this to a domain user account, but this is not usually necessary for local developer installations. Note that the service account settings can be changed through the Services applet in the Control Panel at any point after installation, however SQL Server will require re-starting in order for these changes to take effect.
Click on Next.
14. Change Authentication Mode to Mixed Mode and set a password for the sa logon. The user’s NT logon name could be used as an initial password, but note that whatever is used, it should NOT be the same for each machine as the sa account gives sysadmin privileges to any user who uses it:

Click on Next.15. Keep the default collation settings, UNLESS the DBA for the project specifies that they should be changed. Be aware that certain applications require non-default settings:

Click on Next.16. Select Error Reporting and Usage options – it does not matter what these are set to, as they are completely at your discretion:
Click on Next.17. The pre-installation screen will now appear:
Click on Install.18. The Setup Progress screen will appear, informing you of installation progress:
This step usually takes 10-30 minutes, but requires no user intervention - so now's a good time to take a break and make some coffee.19. The Setup steps have completed:
Click on Next.20. The "Completing Microsoft SQL Server 2005 Setup" screen will now appear:
If you only want the database server to be accessible from the machine on which it is installed, click on Finish. SQL Server 2005 installation is now complete.
However, if you wish the database server to be accessible from other machines, click on the Surface Area Configuration tool link.
21. The "Help Protect Your SQL Server" screen will appear:
Click on the Surface Area Configuration for Services and Connections link.22. The SQL Server 2005 Surface Area Configuration screen will appear:
Click on the Remote Connections node in the left hand tree pane, then click on Local and remote connections. By default, TCP/IP only is selected and is usually sufficient in most development environments, but if you suspect that you may need SQL Server 2005 to host legacy applications which require support for the named pipes SQL Server communication protocol, click on “Using TCP/IP and Named Pipes”. If in doubt, consult the DBA for the project.
In addition, if you wish this installation of SQL Server to automatically announce itself on the network to automatic database server directory queries, click on the SQL Server Browser Service, set the Startup type to ‘Automatic”, click on “Apply”, then click on the Start button.
Click on OK, and then close the “Help Protect Your SQL Server” screen.
Finally, click on the Finish button on the “Completing Microsoft SQL Server 2005 Setup” screen.
SQL Server 2005 setup is now complete.
Subscribe to:
Posts (Atom)